Schritt 4 - Ladegerät hinzufügen (Allgemeiner Schritt)
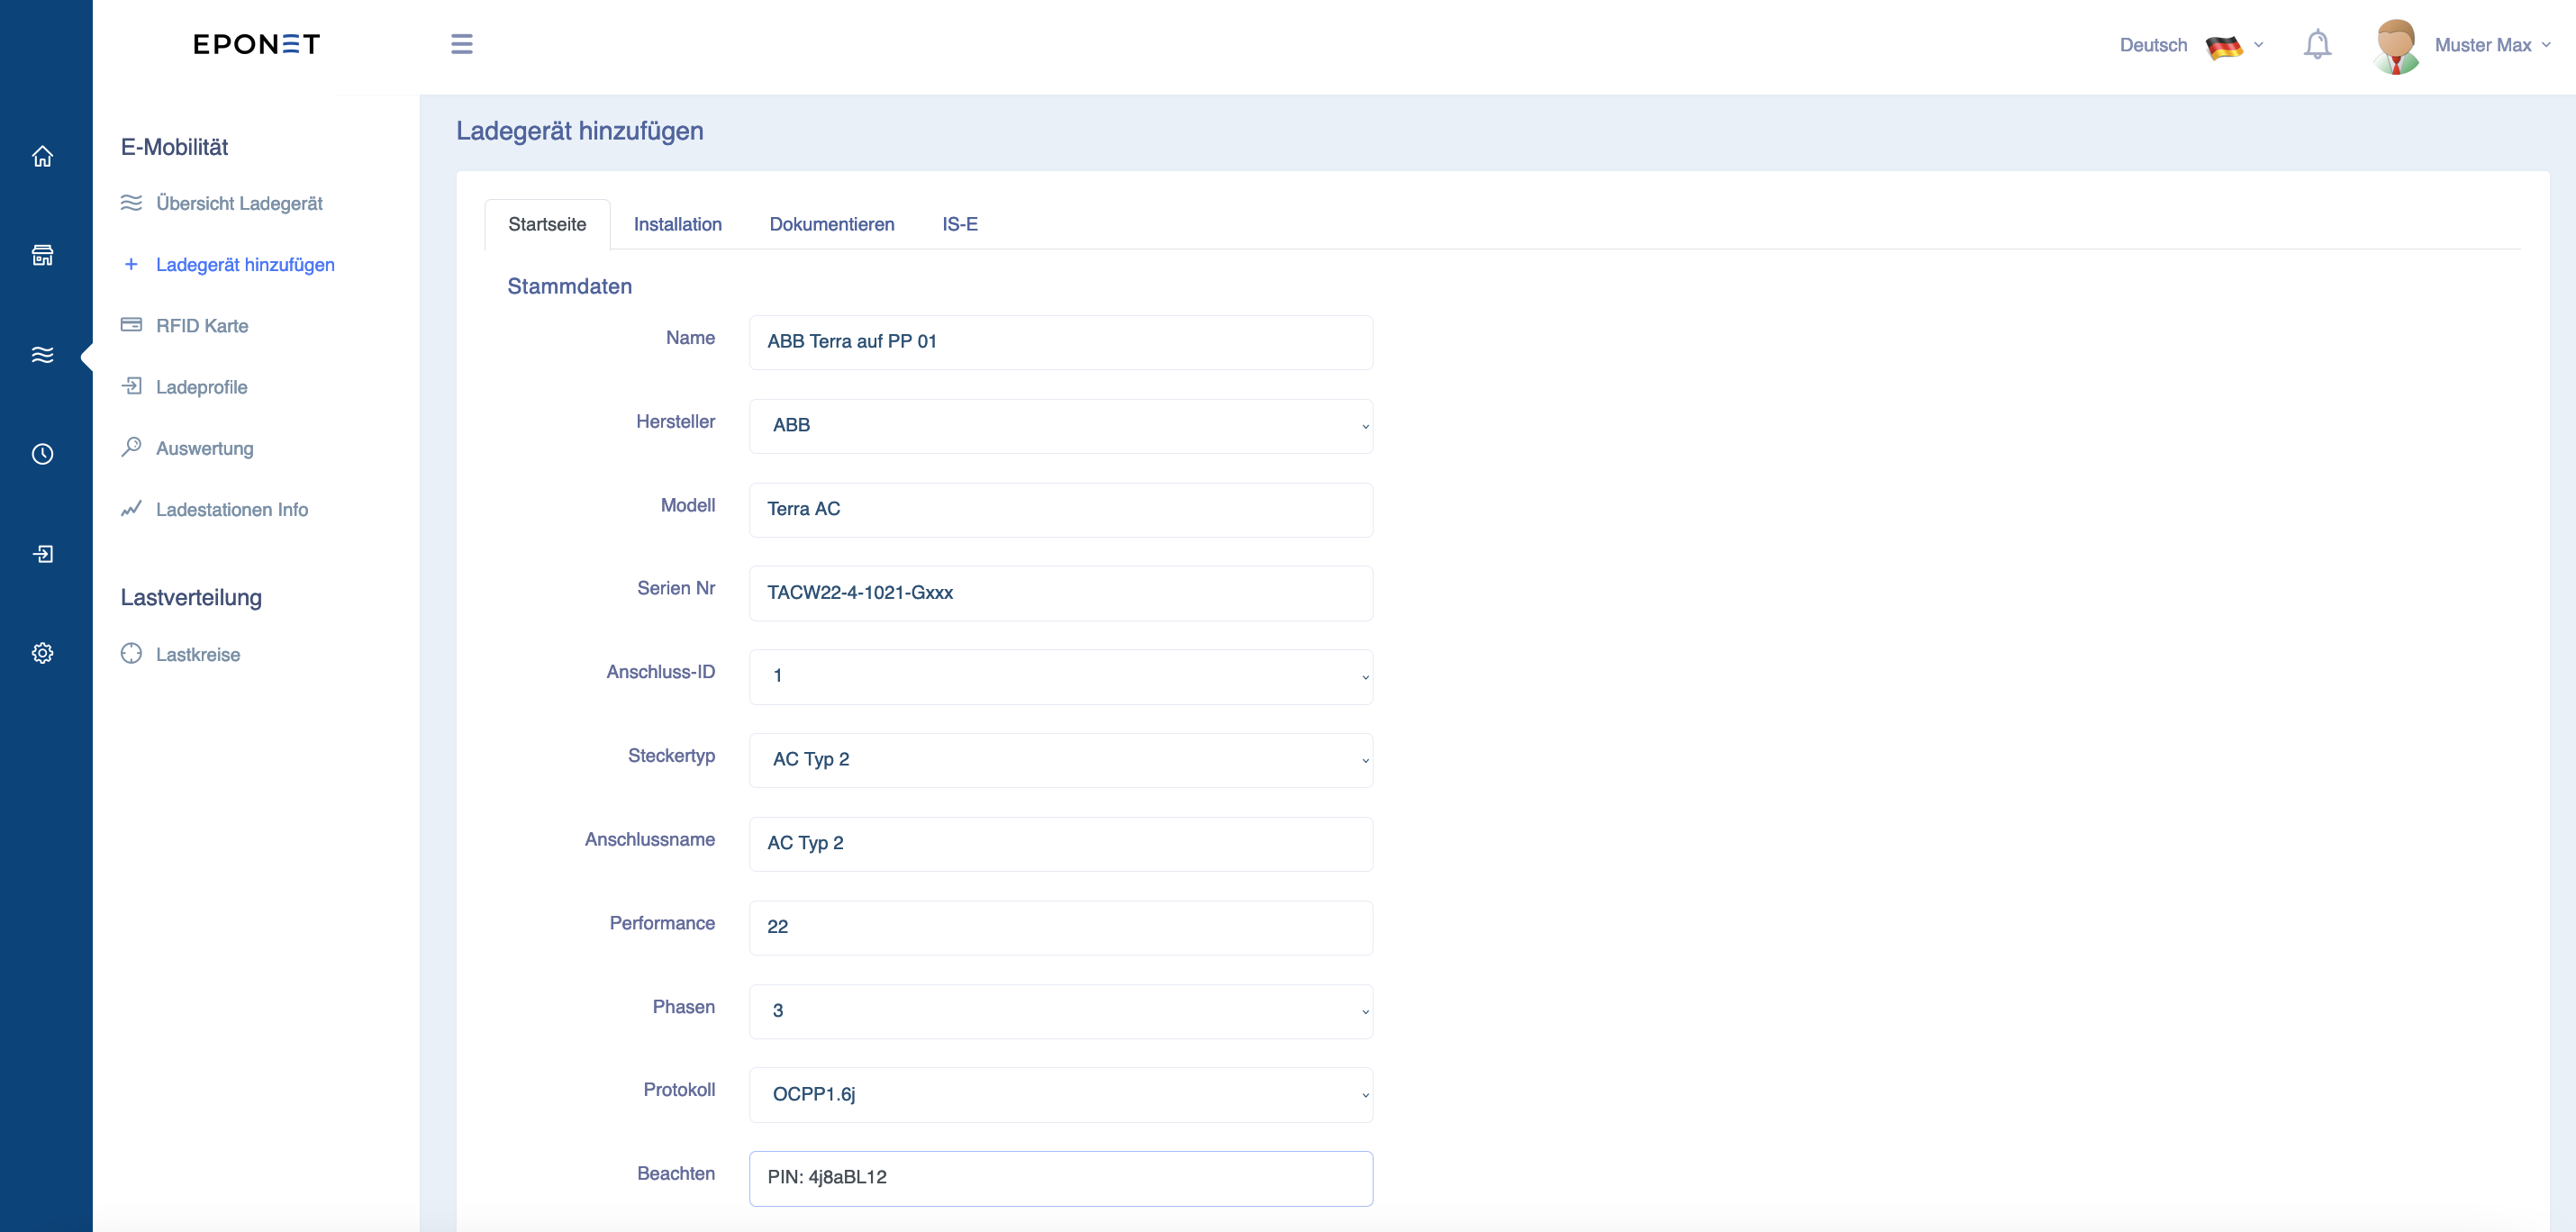
Nun können Sie im blauen Navigations-Balken beim Reiter E-Mobilität das Ladegerät hinzufügen. Der Namen hilft zur späteren Orientierung. Zum Beispiel „ABB Terra auf PP 01“.
Ganz wichtig und zwingend ist die korrekte Schreibweise der Serien-Nummer der Ladestation, zum Beispiel „TACW22-4-1021-Gxxx“.
Anschluss ID: Standart ist normalerweise 1 (diese Auswahl ist für Ladestationen mit mehreren Anschlüssen vorgesehen).
Steckertyp: Wählen Sie zwischen AC Typ 2 oder CCS
Anschlussname: Hier können z.B. bei einem DC-Lader mit mehreren Ladepunkten den Namen “CCS Links” speichern.
Performance: Eine Ladestation kann hardwareseitig auf 11kW begrenzt sein. Geben Sie hier den korrekten Wert ein.
Beim abspeichern kommt nun die Aufforderung: ” Ein Ladegerät muss einem Ort hinzugefügt werden”.
Wählen Sie hier das vorher im Schritt 2 erstellte Objekt aus. Bei Dokumentation haben Sie noch die Möglichkeit Bilder zur Ladestation abzulegen.
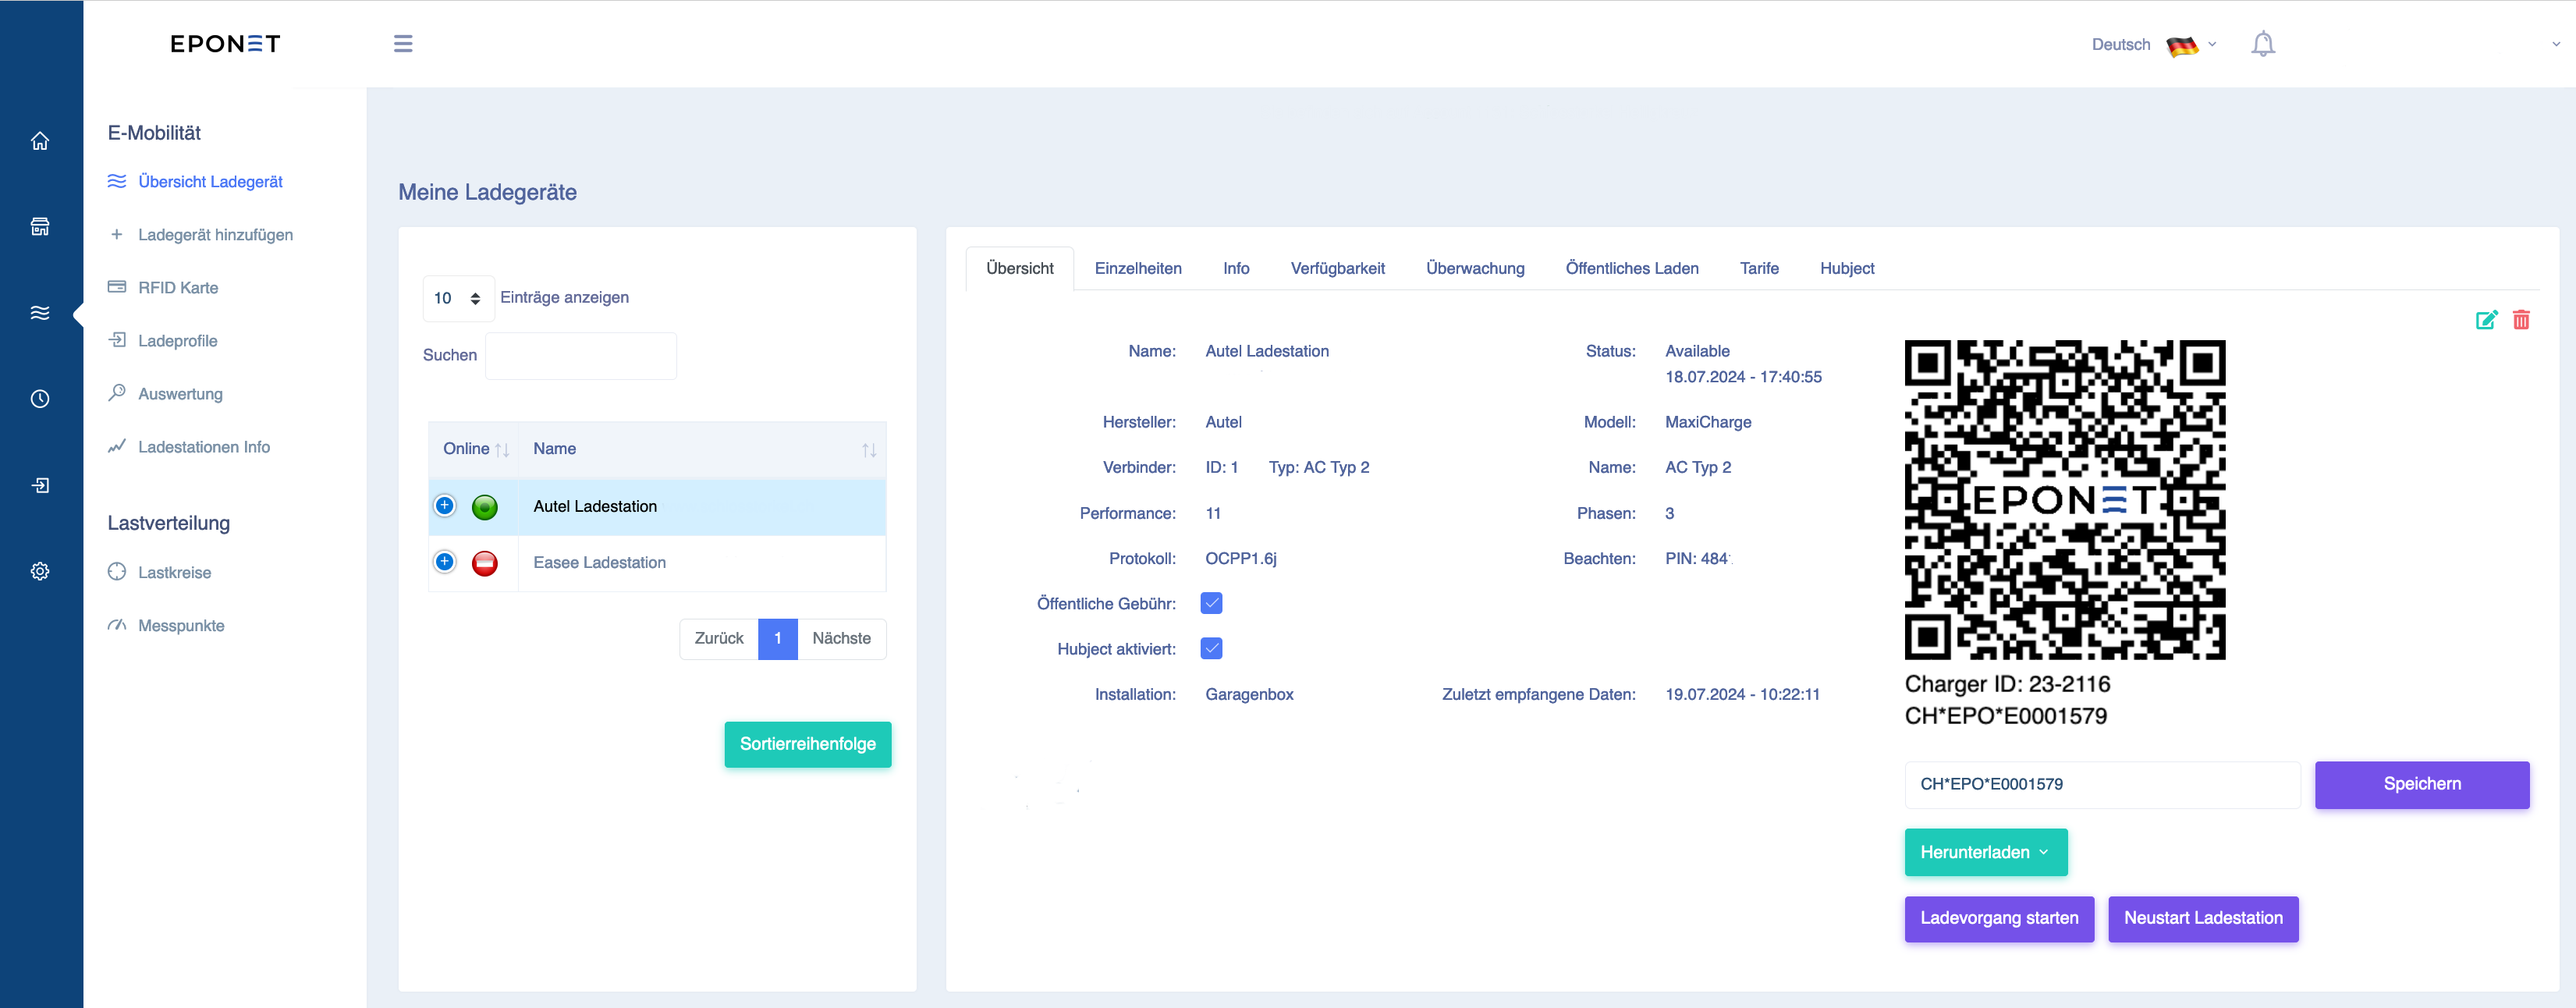
Tipp: Zum testen ob die Ladestation erfolgreich im Portal eingebunden ist, drücken Sie auf Übersicht Ladegerät. Hier können Sie nun Ihre Ladestation auswählen und unter“ zuletzt empfangene Daten“ sollten nun die letzte Verbindung angezeigt werden. Wenn Sie hier ein paar Minuten alte Daten sehen, ist die Integration erfolgreich .
Nach kurzer Zeit sollte die Ladestation mit dem grünen Icon den erfolgreichen Online Status zeigen. Wenn eine Ladestation eine gewisse Zeit offline ist, wechselt das Icon auf rot.