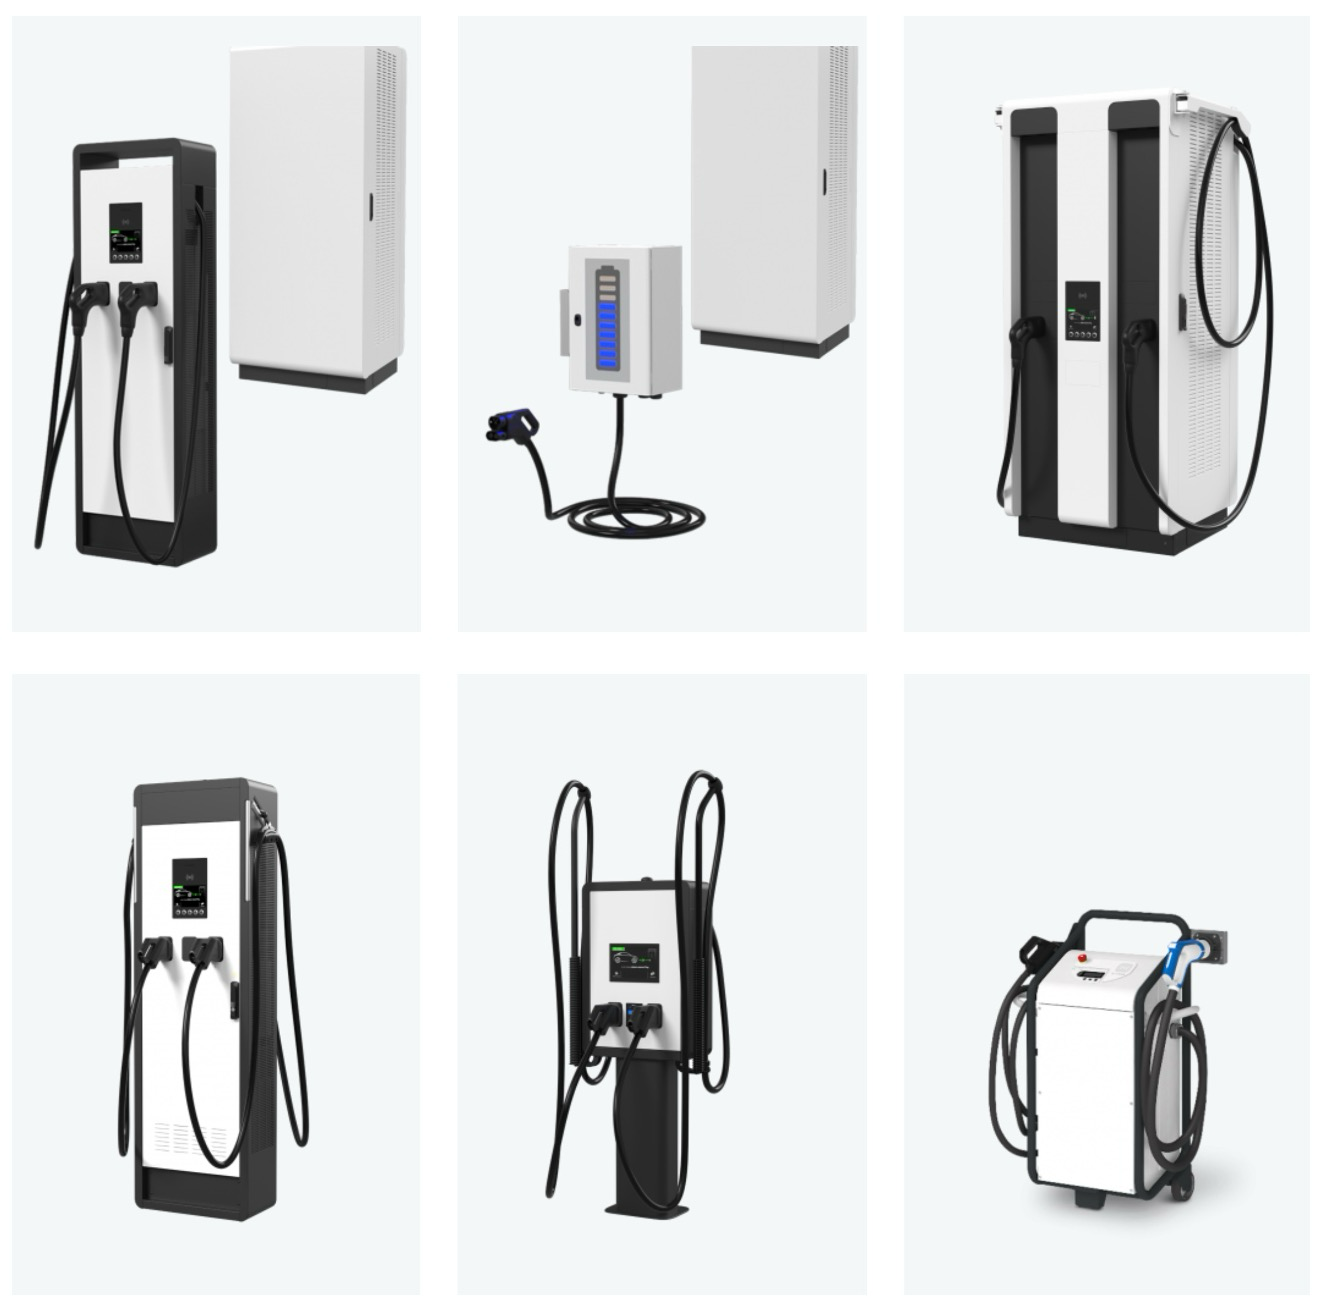
Integration of EVTEC DC charging station into the Eponet portal
These instructions are step 3 for connecting an EVTEC charging station to the Eponet portal.
Step 1 can be found at this link: Basic instructions for integrating charging stations
EVTEC software versions
Software version 2.0 or higher is required.
To connect to the charging station, enter the IP address of the charging station in your web browser. You
can then log in with the username "service" and the password "8080".
The following page will then open.
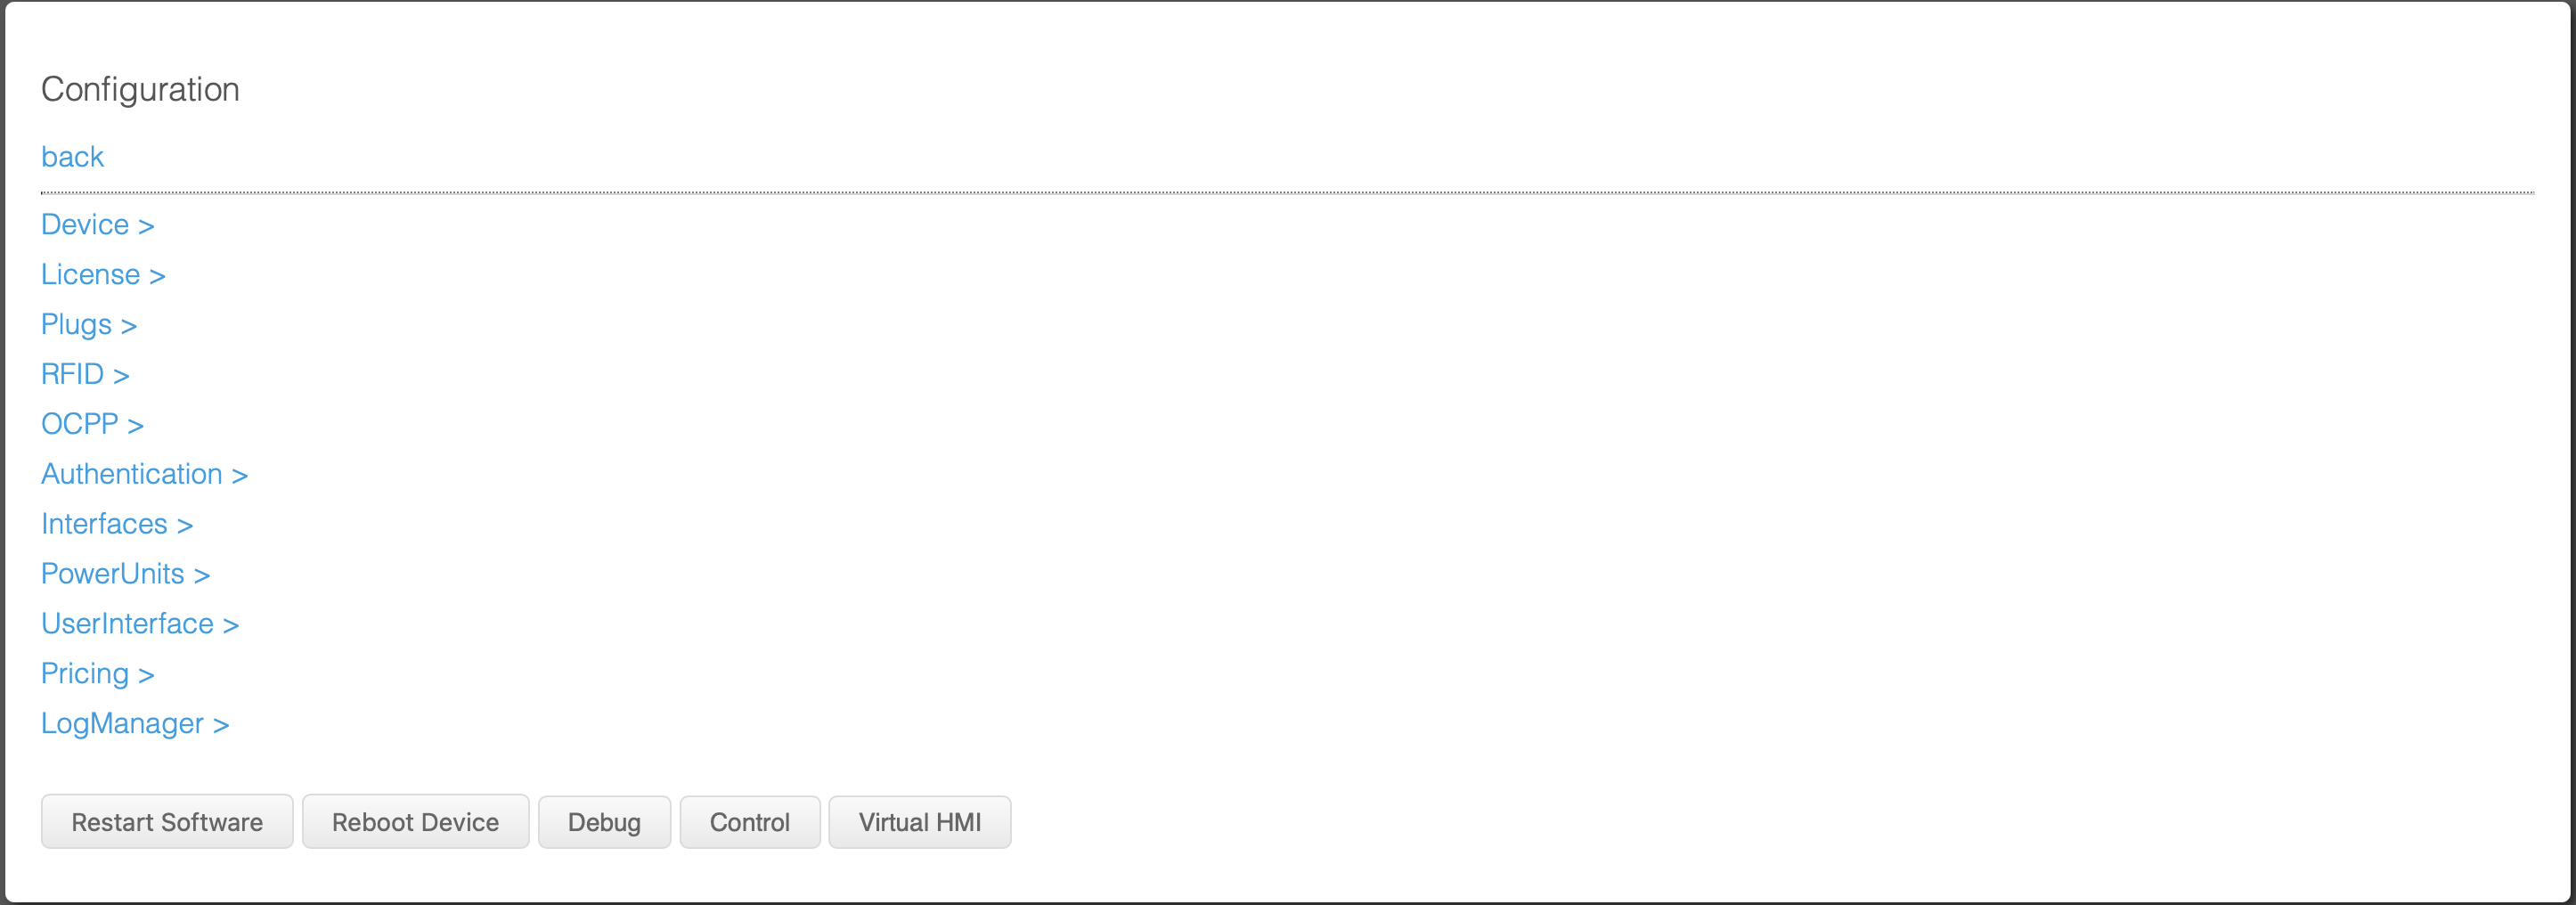
Now you can configure the network. First, select "Interfaces". The following window will then open.
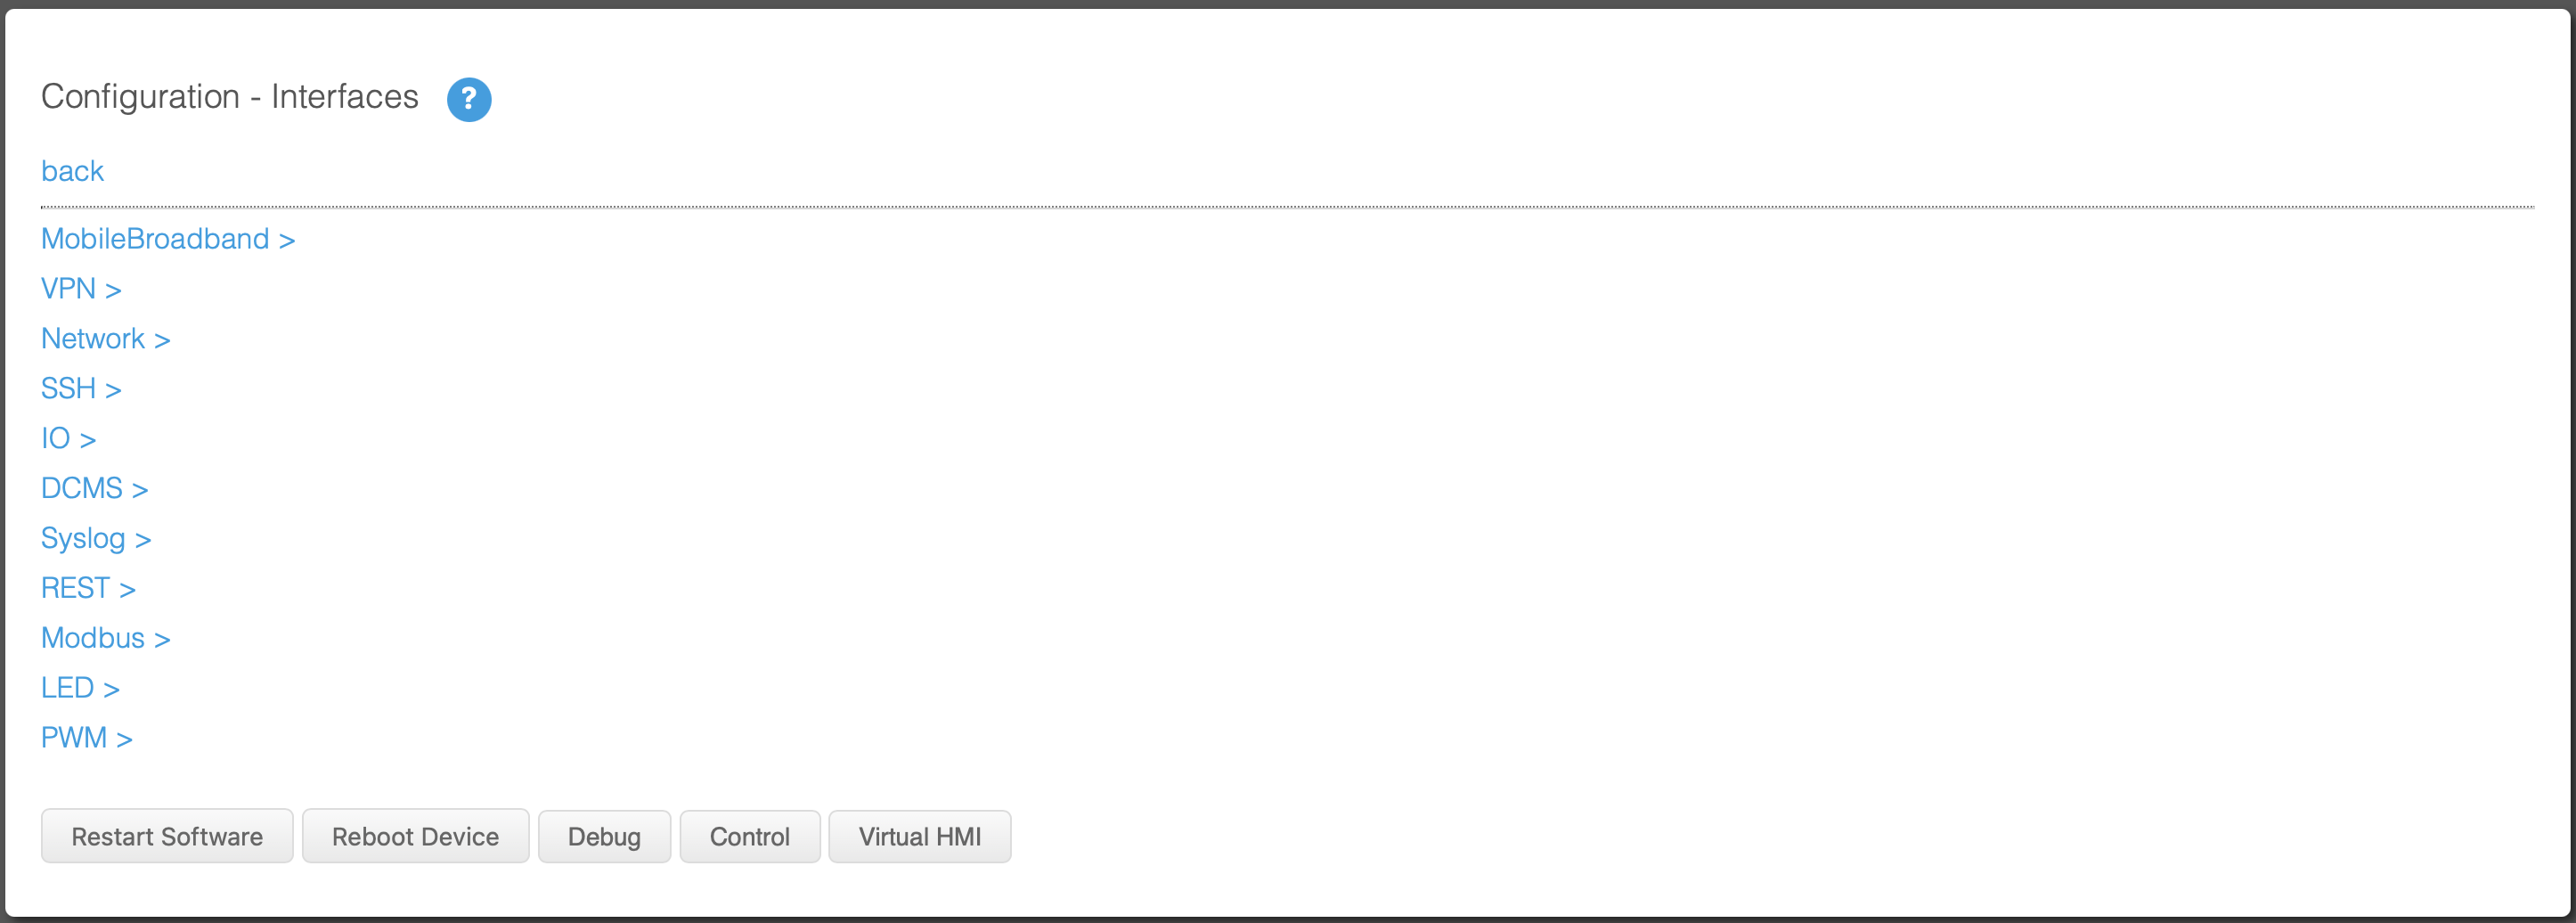
Then click on "Network".

You can then assign either DHCP or a static IP address.
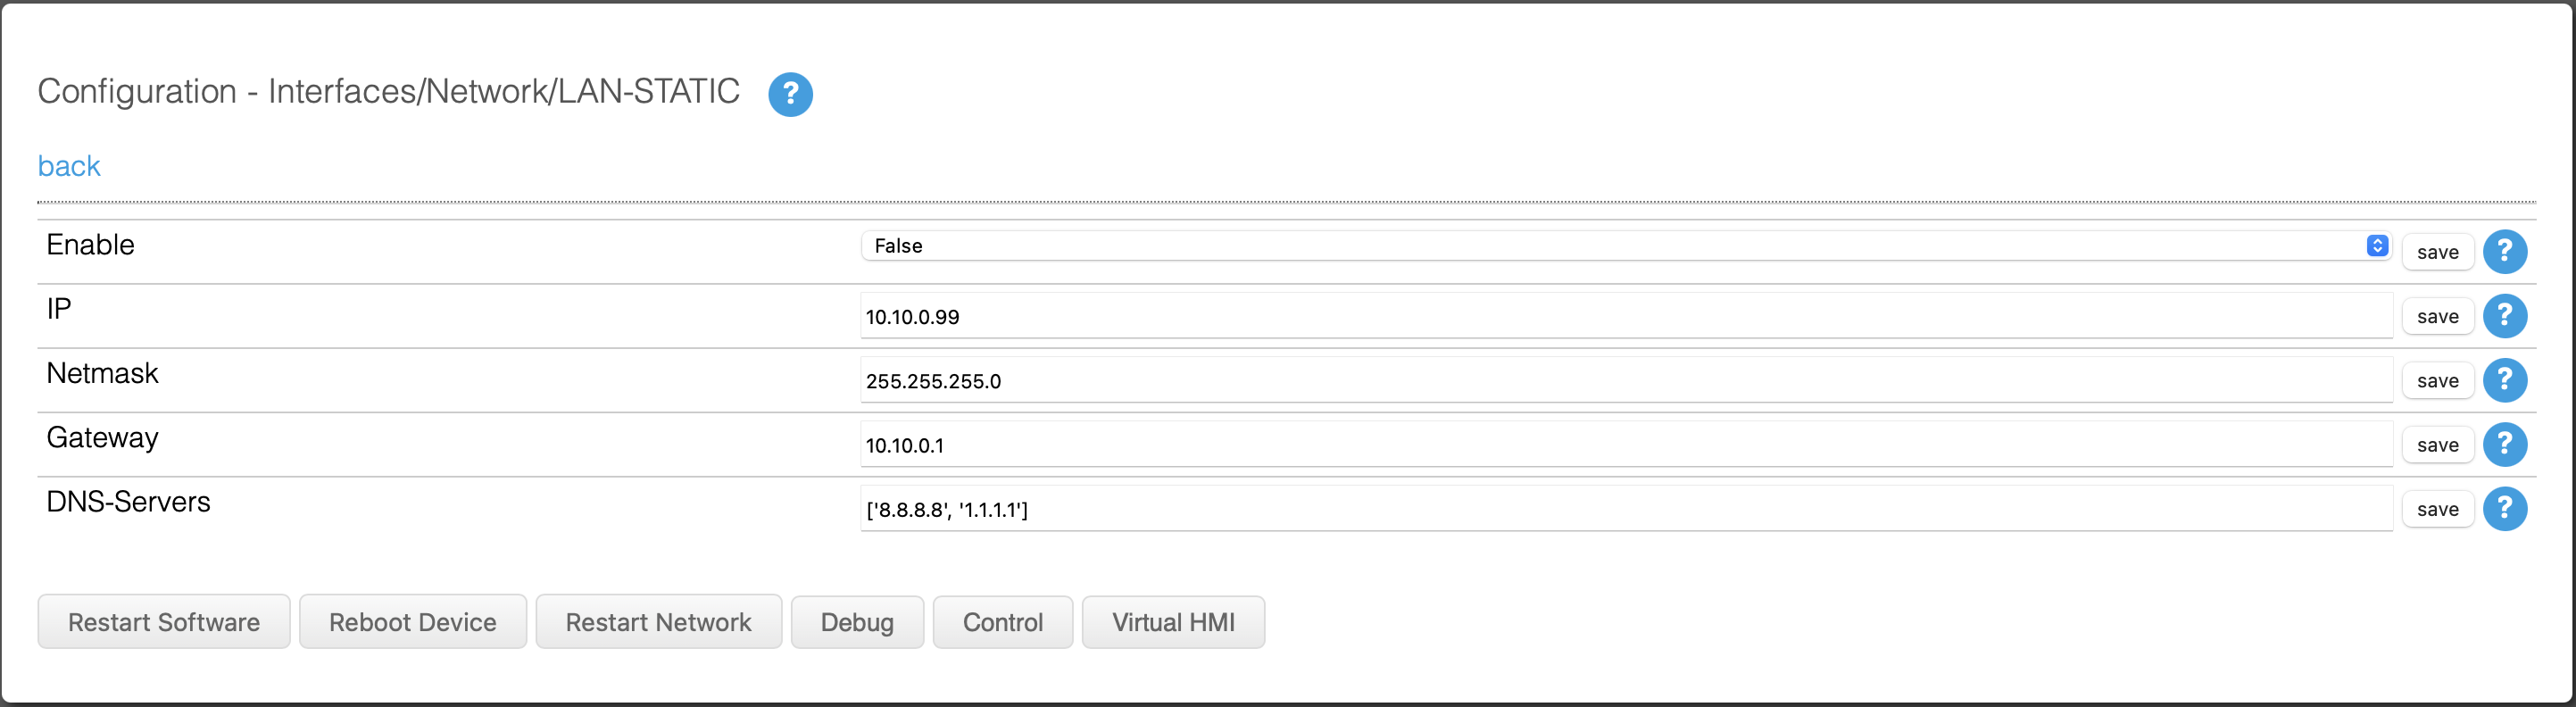
After making the settings, press "save" and return to the first settings page. Then click on "OCPP" and set everything as follows.
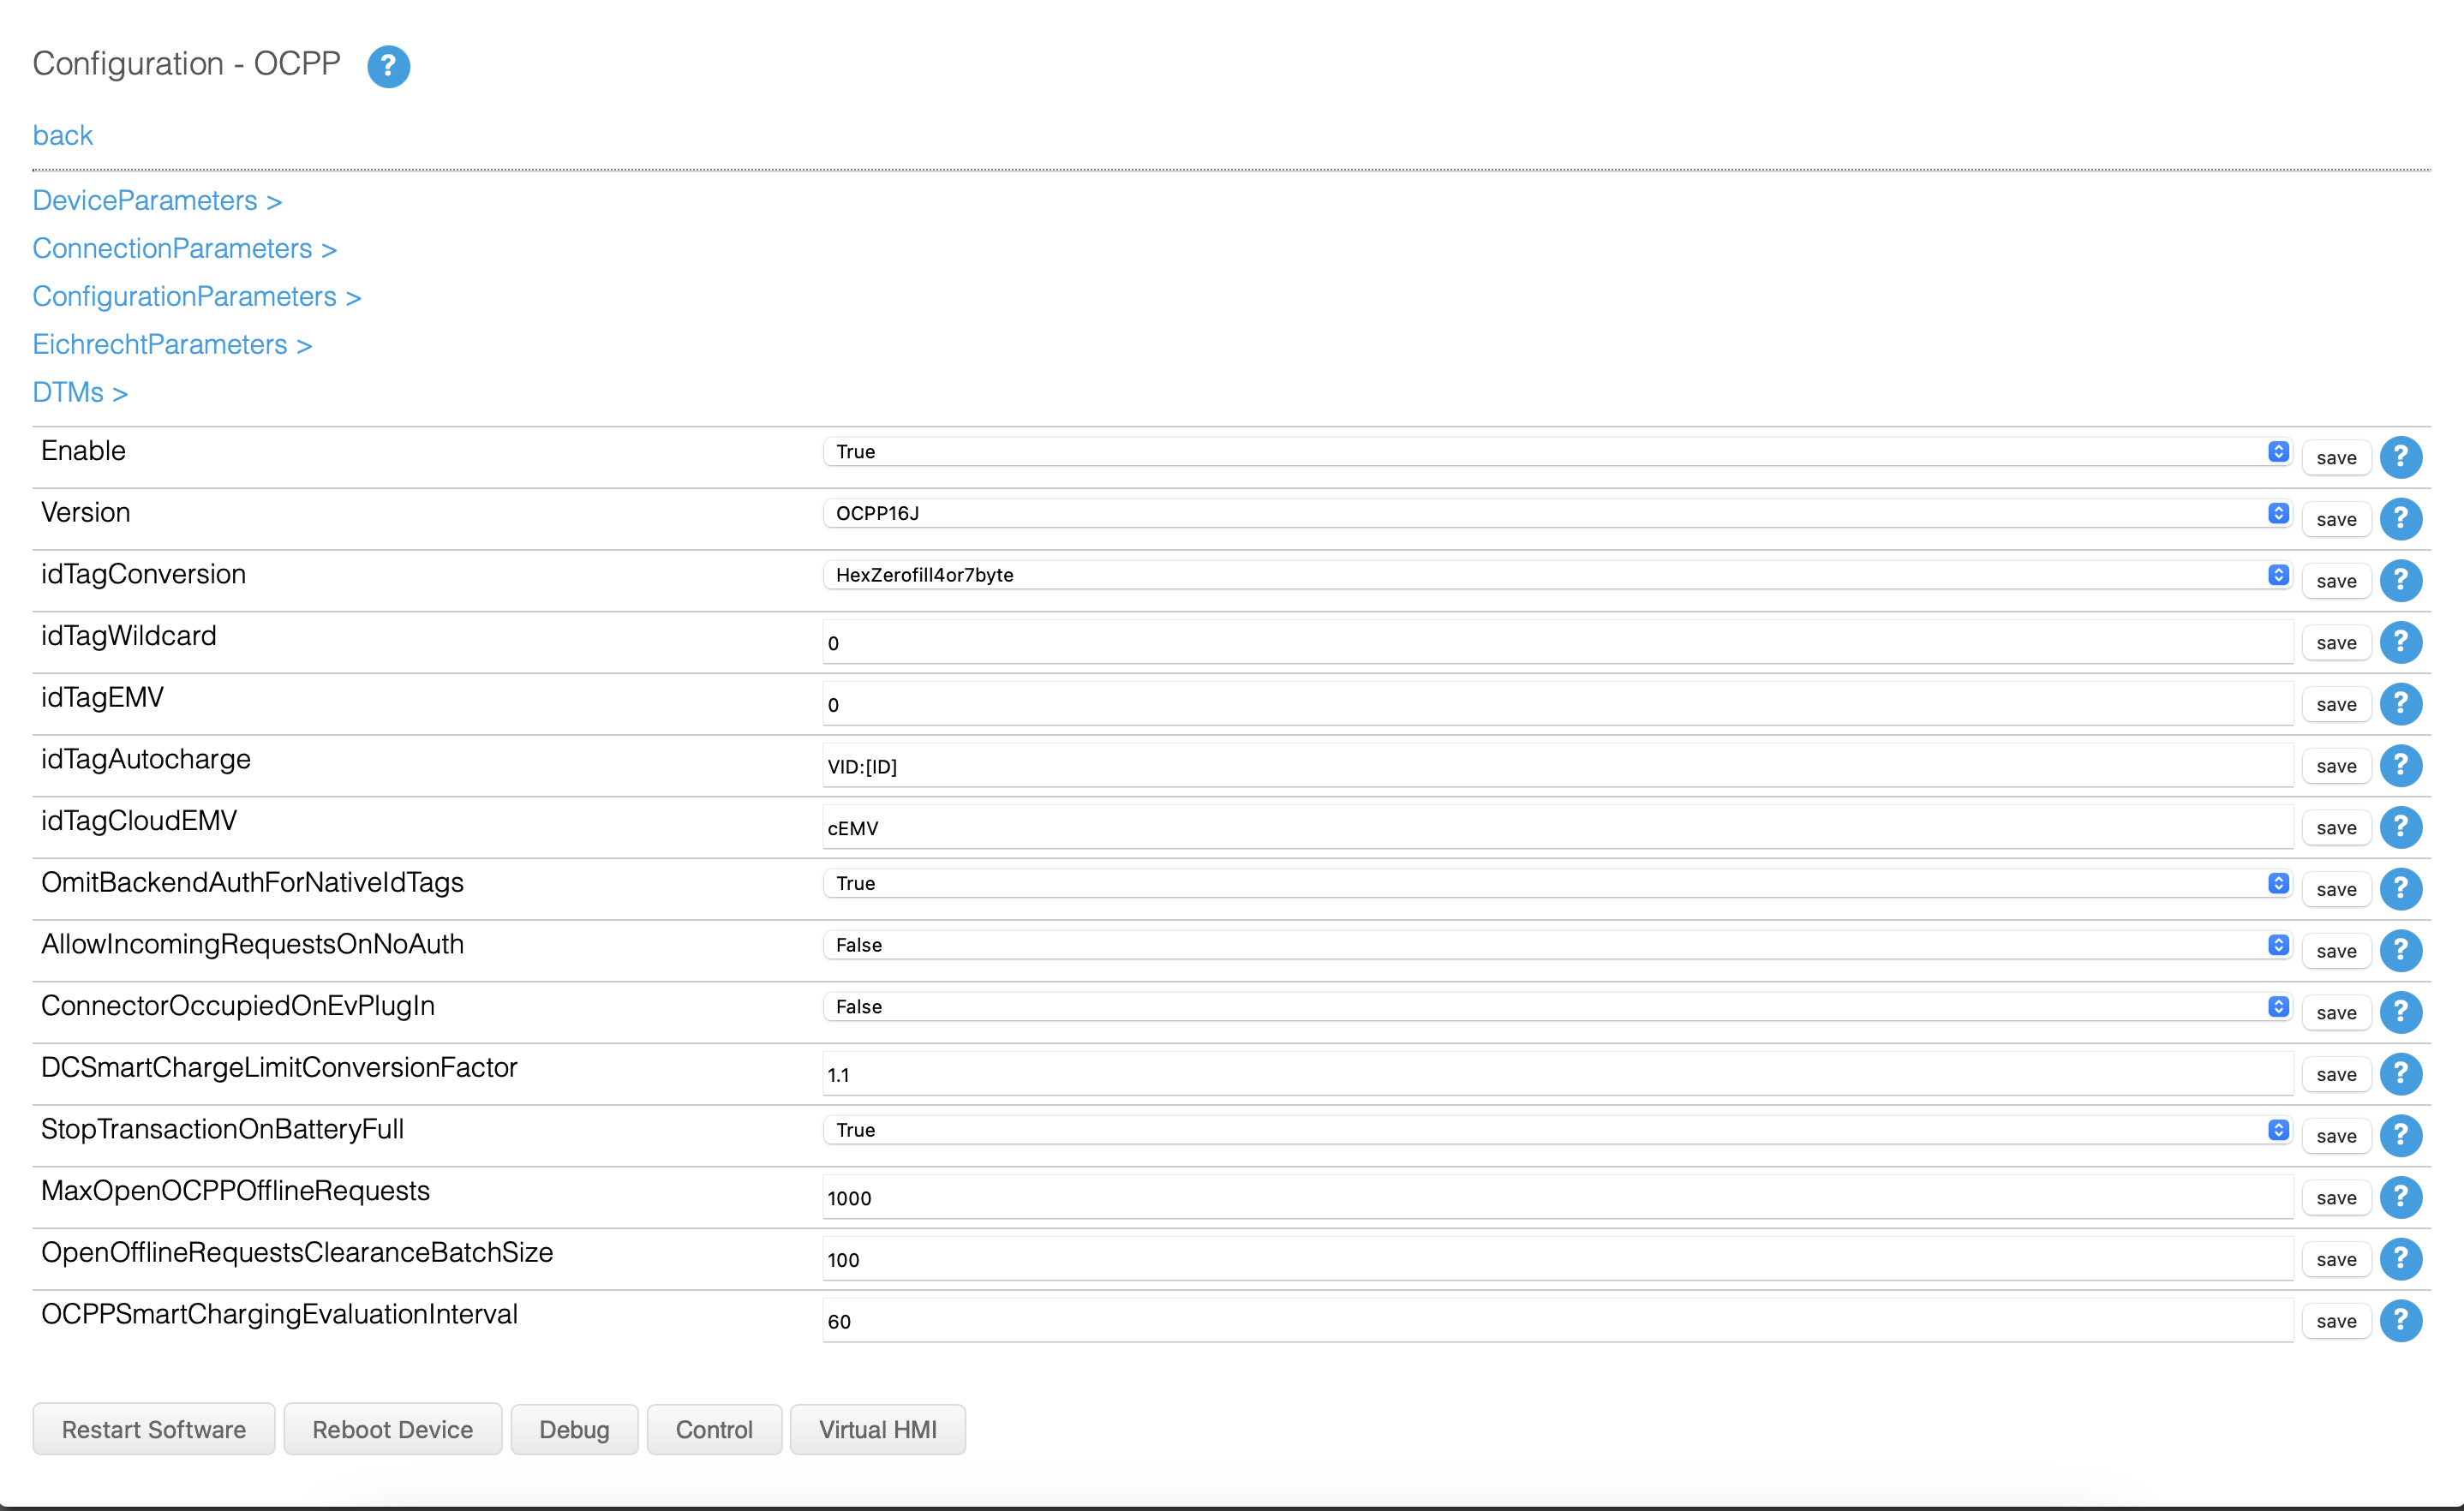
You can then enter the OCPP link.
wss://ocpp.eponet.io/1.6J/3xQv/"serial number"
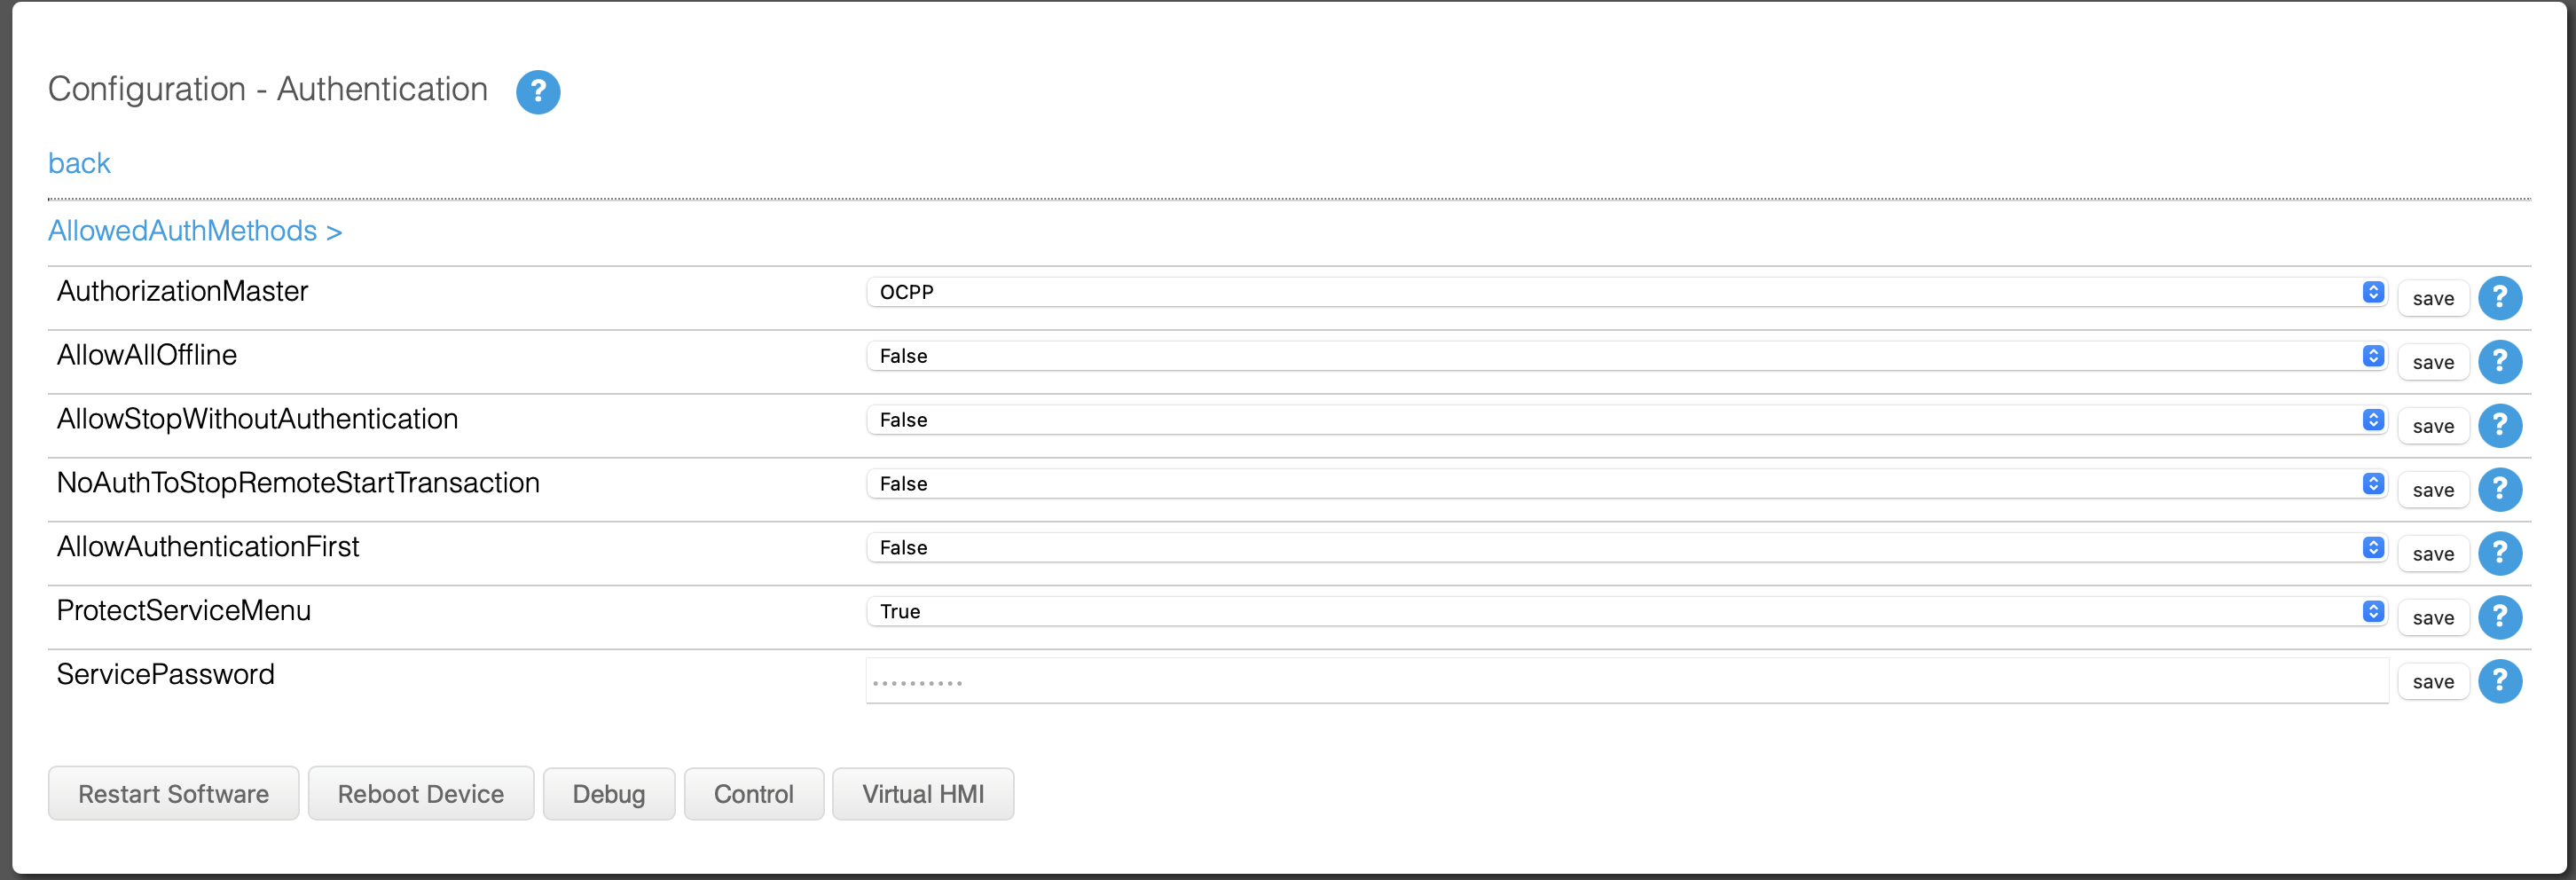
Then return to the first settings page and select "Authentication".
Set everything as follows.
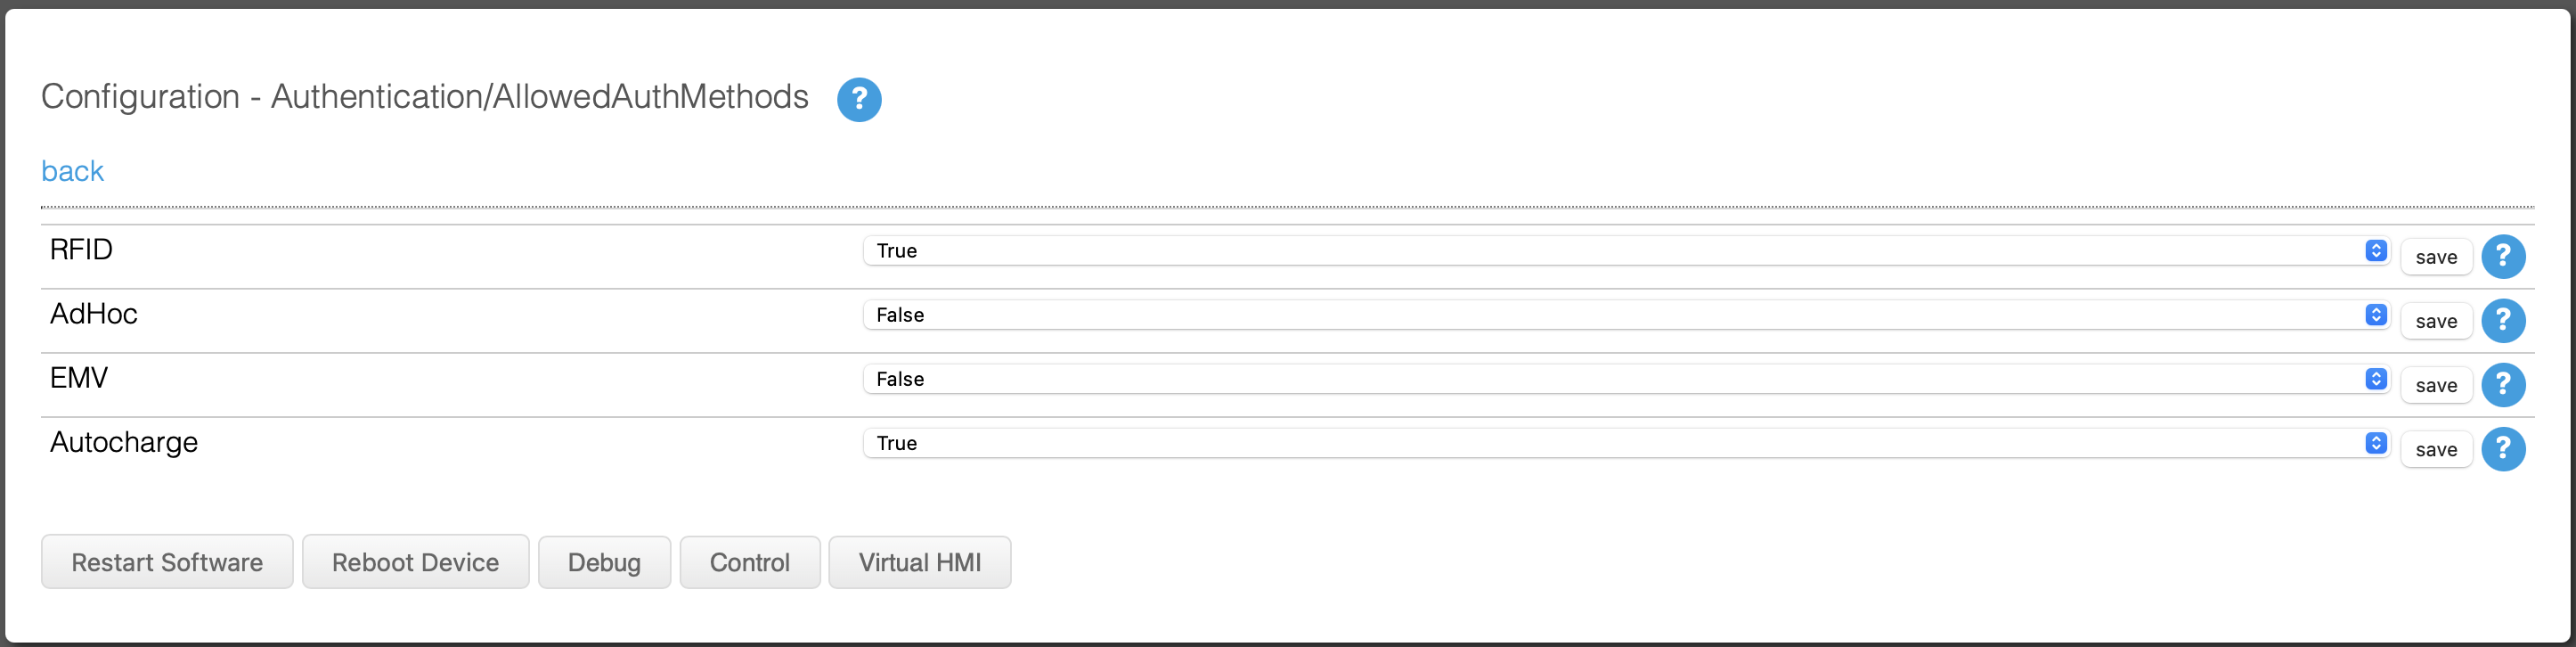
Then click on "AllowAuthMethods" and set everything as follows if you want to activate ISO-15118.
You must then reboot the charging station for all changes to take effect.
Checklist:
-
Software checked / latest version?
-
Internet configured / online?
-
OCPP server: Eponet link selected and charging station online on the Eponet portal?