invoices
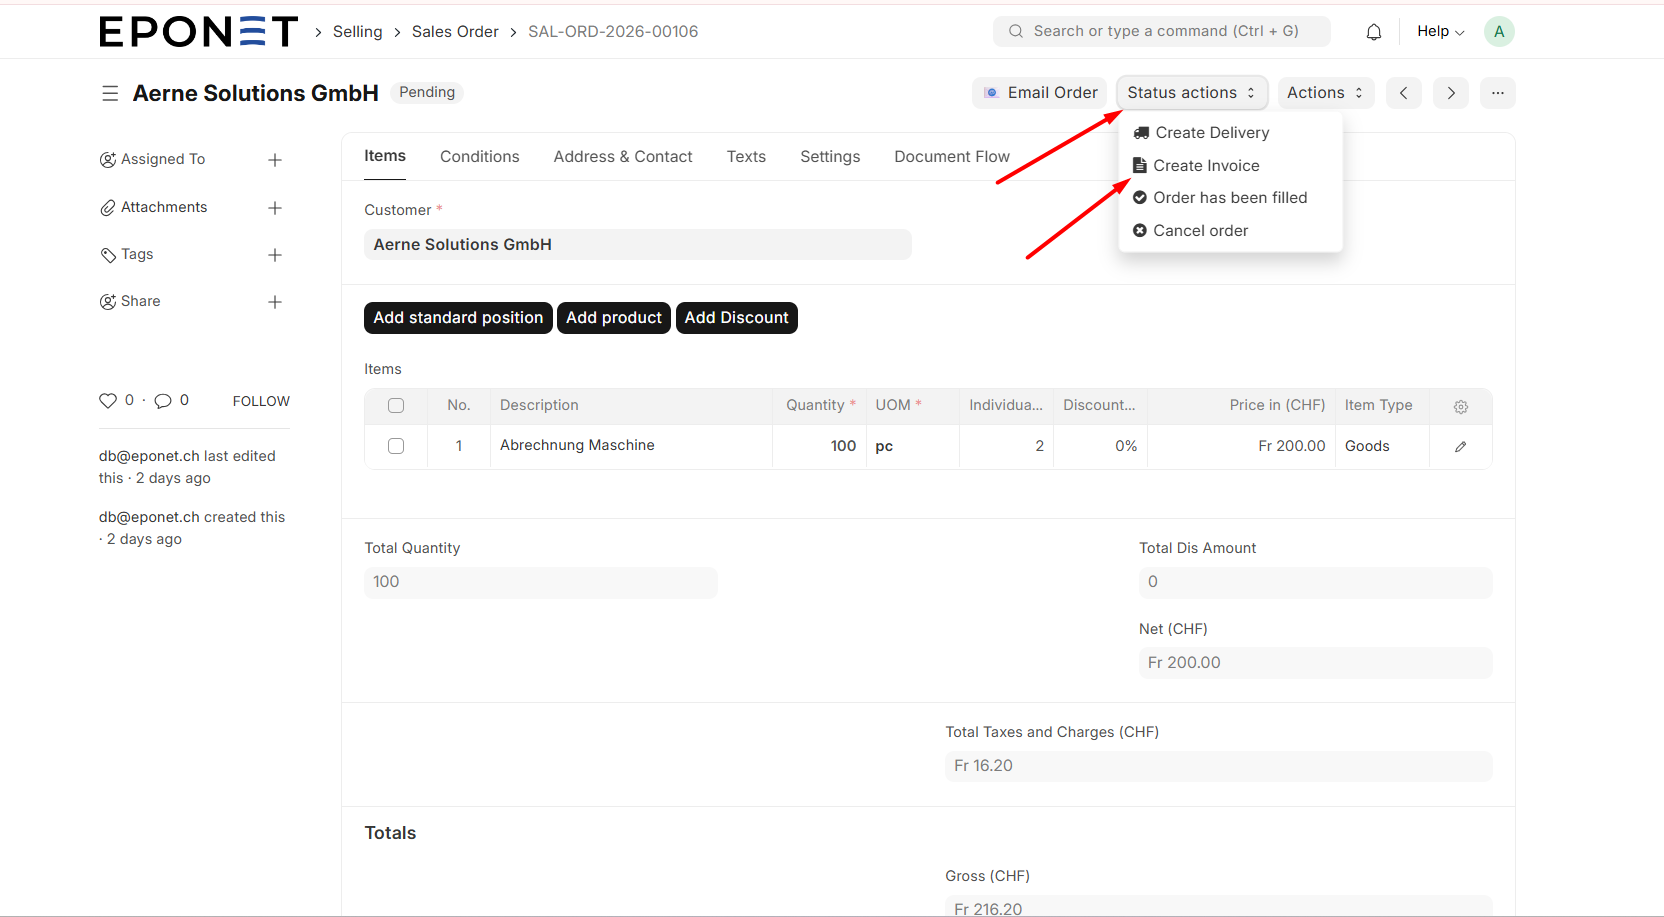
Creating an Invoice from a Sales Order
• Open the Sales Order — Navigate to the Sales Order you want to invoice.
• Click 'Actions' > 'Create Invoice' — In the top action bar, click Actions and select Create Invoice. A popup dialog appears showing the Main Items from the order.
• Select items to invoice — In the popup, you can select which items from the order to include in this invoice. Tick the items you want to bill. This allows partial invoicing if you are delivering in stages.
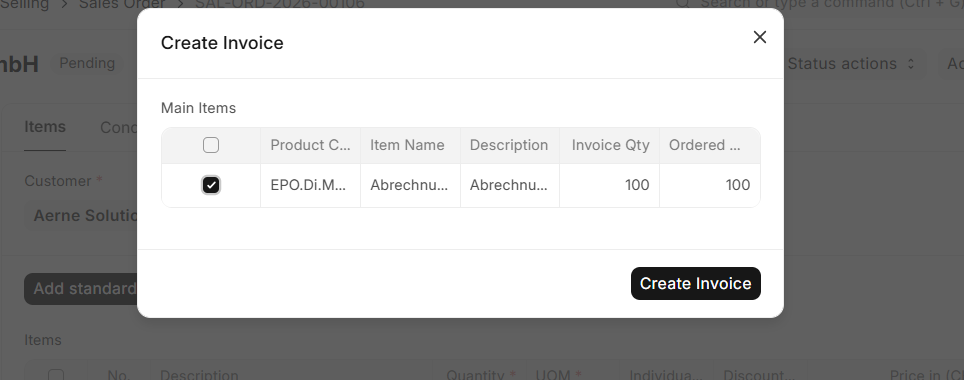
• Click 'Create Invoice' — Click the black 'Create Invoice' button. The invoice is generated and opens automatically.
Invoices
A Sales Invoice is the official billing document sent to the customer requesting payment for goods or services delivered. In EPONET, invoices are created from Sales Orders so all line items and pricing carry over automatically. Invoices are tracked in the Accounting module.
Key elements of the Invoice form:
• Summary bar at the top — shows Invoice amount, Incoming payments received, Credit notes, and Pending amount (what is still owed, shown in red).
• Submit button — the invoice must be submitted to become official. While in Draft, it can still be edited.
• 'Submit this document to confirm' banner — a reminder that the invoice is not yet active.
• Is Return (Credit Note) checkbox — tick this only if you are creating a credit note to reverse a previous invoice.
• Company Tax ID — auto-fills from your company settings and appears on the invoice PDF.
Submitting the Invoice
• Review the invoice — Check that all items, quantities, prices, tax amounts, and customer details are correct.
• Click Submit — Click the black Submit button in the top-right. The invoice status changes from Draft to Unpaid. The invoice is now officially issued.
Important: Once submitted, you cannot freely edit the invoice. If you need to make changes, you must cancel the invoice and create a new one, or raise a credit note. Always review carefully before submitting.
Emailing the Invoice to the Customer
• Open the submitted Invoice — The status should be Unpaid.
• Click 'Email Invoice' — Click the blue 'Email Invoice' button in the top action bar. An email dialog opens pre-filled with the customer's email address, invoice number, and payment details.
• Review and Send — Check the email content and click Send. The invoice is emailed to the customer.
Downloading the Invoice as PDF
• Open the Invoice — Navigate to the invoice.
• Click 'Actions' > Print/Download — Use the Actions menu or the print icon to generate the invoice PDF. You can save it locally or attach it to an email manually if needed.
Creating a QR Bill
EPONET supports Swiss QR bill standards. If your invoice should include a QR payment slip:
• Open the submitted Invoice — Navigate to the invoice.
• Click 'Create QR bill' — Click the 'Create QR bill' button in the top action bar. EPONET generates the QR payment slip which can be included in the invoice PDF.
Invoice Statuses
|
Status |
What it means |
What to do next |
|
Draft |
Invoice created but not yet submitted. Still fully editable. |
Review carefully then click Submit. |
|
Unpaid |
Invoice submitted and sent to customer. Payment not yet received. |
Follow up if payment is not received by the due date. |
|
Partly Paid |
A partial payment has been recorded. Balance still outstanding. |
Follow up for the remaining amount. |
|
Paid |
Full payment received and recorded. Invoice is closed. |
No further action needed. |
|
Overdue |
Payment due date has passed with no or insufficient payment received. |
Contact the customer urgently. Escalate if needed. |
|
Cancelled |
Invoice was cancelled (e.g., due to an error or cancelled order). |
Issue a credit note if the customer was charged. |
|
Return |
A credit note has been raised against this invoice. |
Verify the credit note is recorded correctly. |